Place Printed Models
|
|
Set Timer

-
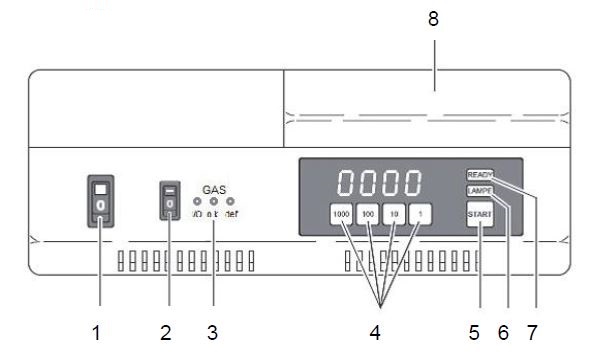
(1) Main switch
-
(2) Protective gas switch, if applicable
-
(3) Protective gas display, if applicable
-
(4) Display with keypad
-
(5) Start button
-
(6) Lamp control light
-
(7) Ready indicator
-
(8) Polymerization chamber
-
Switch the Otoflash on with the main switch.
Tip: The green light indicator labeled “Ready” will light up and a 4-digit figure will appear on the display. This figure indicates the number of flashes. -
Set the required number of flashes by pressing the buttons 1000, 100, 10, and 1.
-
Press Start to start the program.
→ The timer starts counting down with every flash.
→ When the programmed number of flashes is completed, an acoustic signal sounds three times, and the word End appears on the display.
→ The timer is set to the initially programmed number of flashes.
