Set Up
-
Place the PCA 2000 on a dry, flat surface, well away from water sources and dust.
-
Plug the PCA 2000 into a stable outlet.
-
Remove the protective film from both sides of the post-curing tray before installation.
-
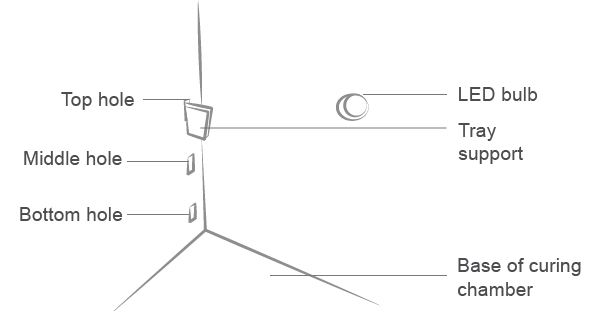
Remove the black plastic tray supports from the bag they have been sent in.
-
Install the four tray supports in the highest hole possible among the three holes for the tray supports. This ensures the Post Curing Tray is at the correct distance from all LED light sources.
-
Once all four tray supports are in place, lower the post-curing tray into the curing chamber.
-
Connect the power cable to the PCA 2000 and into a power socket: US – 110V / EU – 220V with a grounding socket.
