In some cases, you may find that manually adding supports is a better option than relying on auto-generated ones.
1. Select a model on the platform.
2. Press the icon on the left Toolbar.
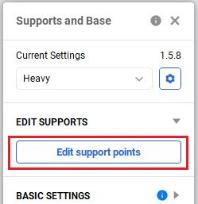
3. Under Edit Supports, press Edit support points.

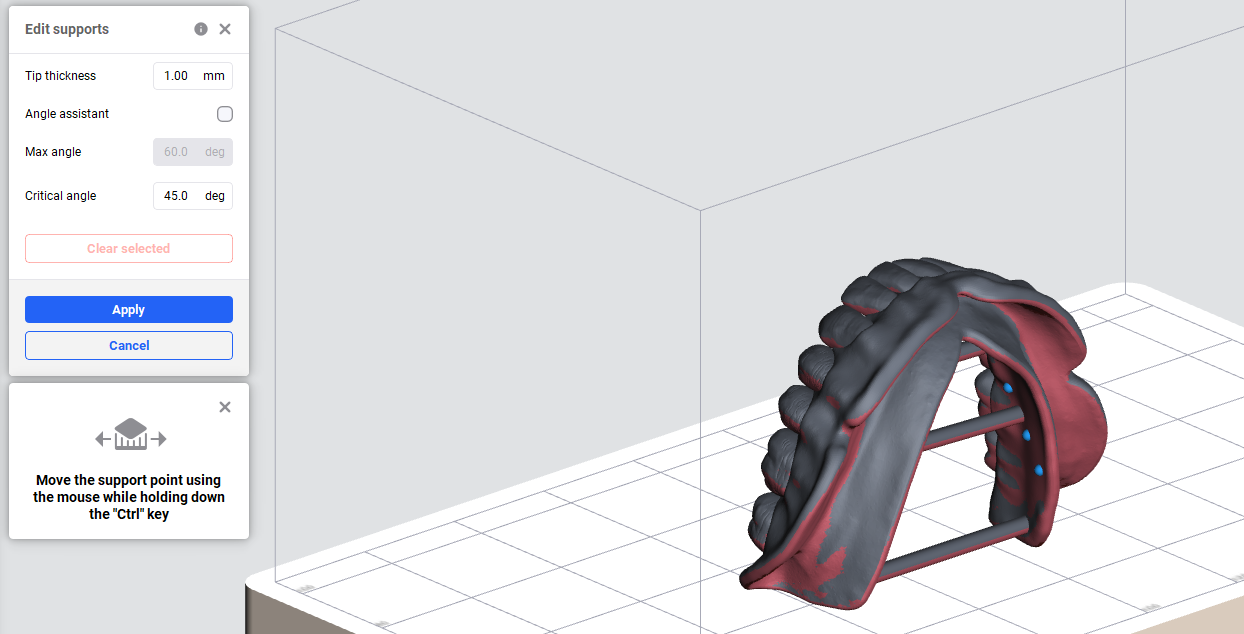
4. Select where to add supports by clicking on the corresponding surface point of the selected model. The places where the supports will be generated are marked as red spots. To delete a support point, click on it.

5. To adjust the tip thickness, use the ↑ and ↓ arrow keys or the mouse scroller on the Tip thickness value field. The greater the value, the thicker the supports will be.
6. To move the support point, hold down the Ctrl key and drag it with the mouse. Release the mouse once the new location is selected.
7. Select Apply.
→ The new supports are added.
Add Beams
To enhance the support for your model, particularly a dental one, you can add beams.
1. Select a model on the platform.
2. Press the icon on the left Toolbar.
3. Under Edit Beams, select Add beams.
4. To adjust the beam diameter, use the ↑ and ↓ arrow keys or the mouse scroller on the Beam diameter value field.
5. Select the starting point of the beam by clicking on the surface of the model and holding down the left mouse button. Once you've selected the end point of the beam and are satisfied with the beam placement, release the mouse button.

6. After you have finalized the locations of the added beams, select Apply.
→ The new beams are added.
Edit Beams
1. Select a model on the platform.
2. Press the icon on the left Toolbar.
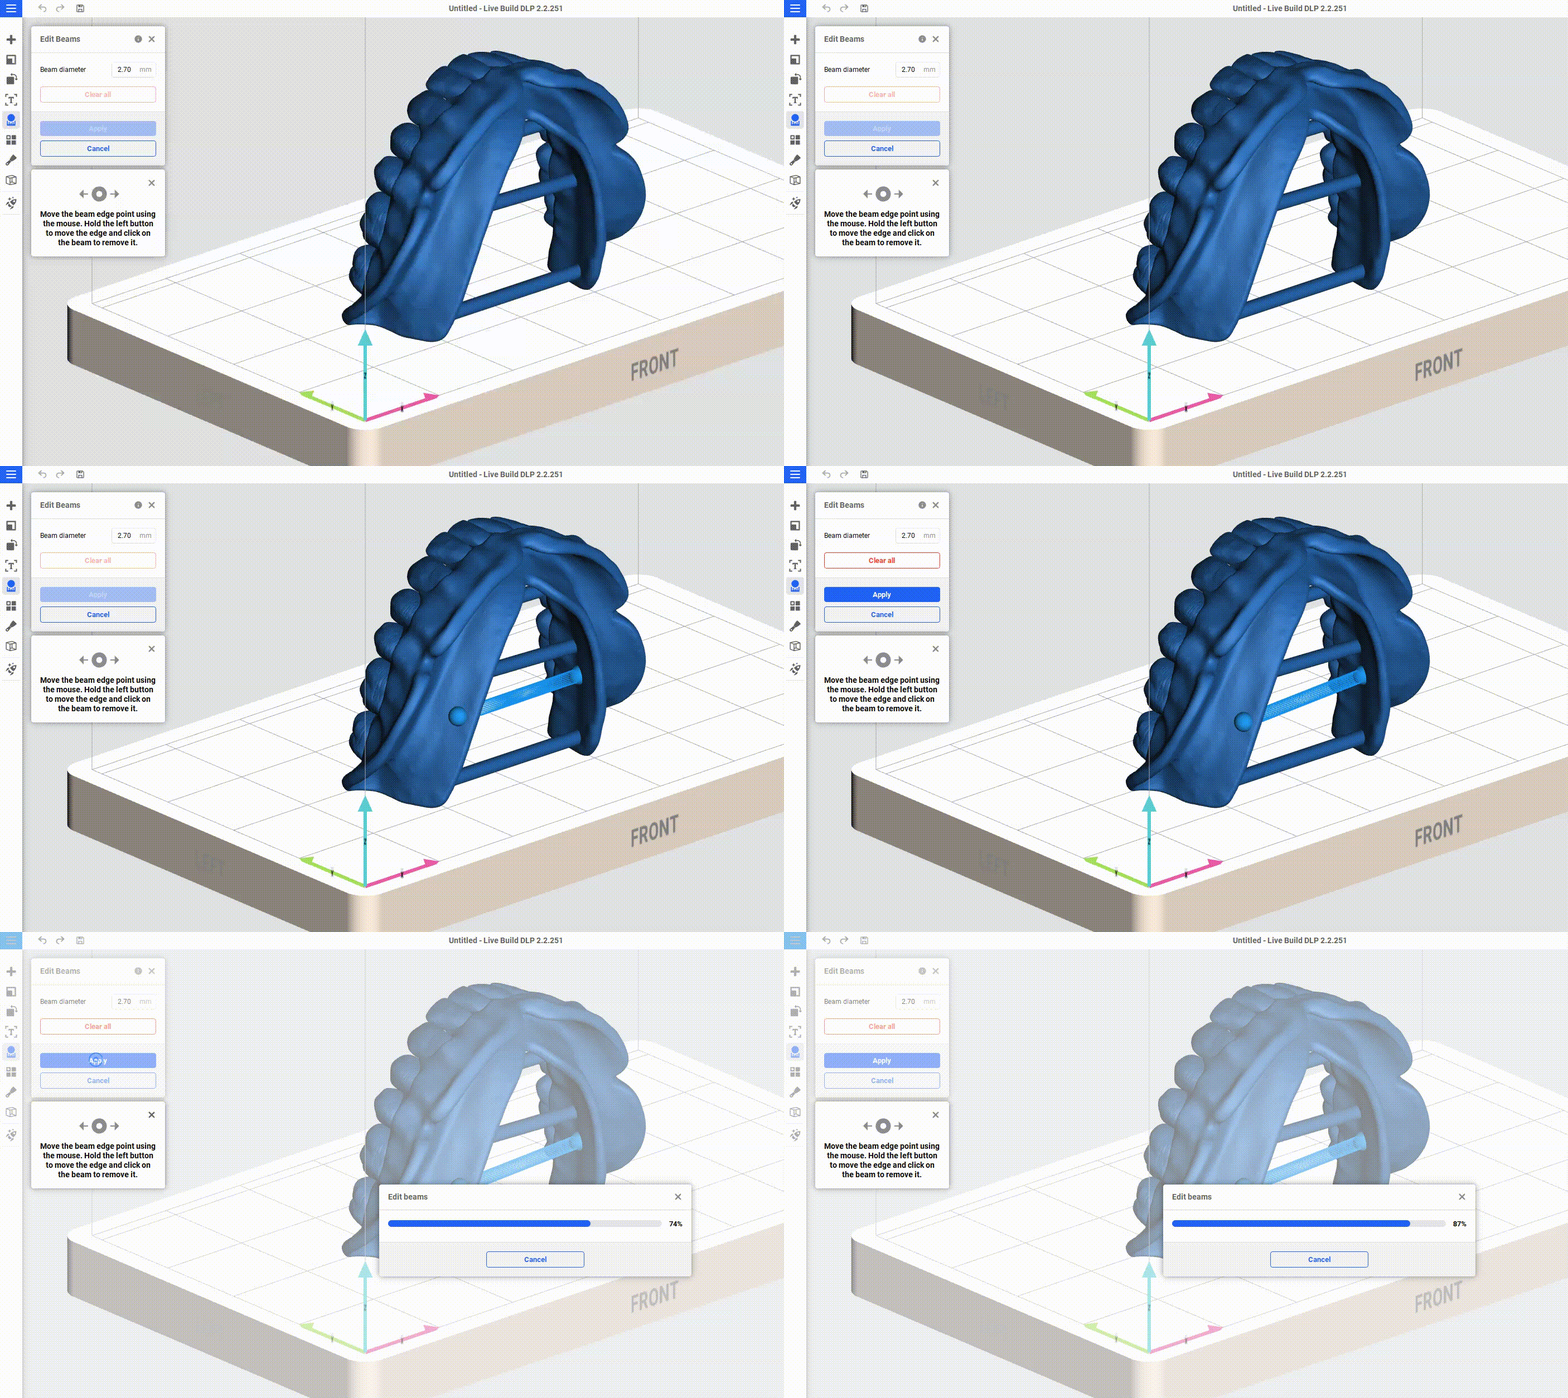
3. Under Edit Beams, select Edit beams.
4. To edit the beam location, drag the end point of the beam while holding the left mouse key. Release the mouse once the new location is selected.

5. Select Apply to save changes.